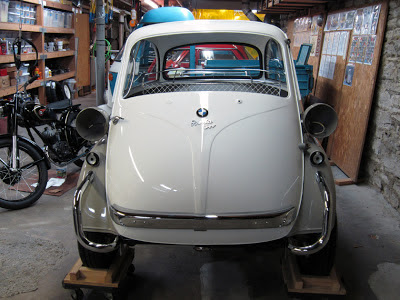
Click on any of the above screen captures to go to the YouTube video of the episode of Wheeler Dealers that aired on October 23, 2011 featuring the restoration of a BMW Isetta. If you're not familiar with Wheeler Dealers, it is a British television series produced for the Discovery Channel. The premise of the show is that Mike Brewer and Edd China are on a mission to save repairable classic vintage vehicles, by repairing or otherwise improving an example of a particular make and model on a budget, then selling it for a profit.
Tuesday, October 30, 2012
Tuesday, October 23, 2012
Blog Watch
I thought I'd mention a couple of relatively new microcar blogs that I've been enjoying.
The first one is Heinkel Cars, Kabines and Cabin Scooters. If you're a fan of the Isetta's funky cousin the Heinkel-Kabine, you'll enjoy this blog as New England scooter enthusiast Shawn M. blogs about the restoration of his Heinkel-Kabine as well as posting some nice period literature and pictures of his beautifully restored scooters.
The second blog is Isetta Velam Journal D'une Restauration. This is a French microcar enthusiast blogging about the restoration of his Isetta Velam. Most of the photos of Velams you see on the web are of complete cars sitting in museums or in somebodies collection, so I'm really enjoying seeing pictures of one in the process of restoration. In my humble opinion, I think Velams are one of the most beautiful versions of the Isetta.
Monday, October 15, 2012
Isetta - Front Bumper
I'm really into the fun stage of my Isetta restoration. Finishing up all the little details that make the car almost look complete. The latest installed items were the front bumper and emblems.
Here's a picture of the original front bumper next to the new reproduction bumper I purchased from Isettas-R-Us. Before I purchased the new bumper, I had taken my old one to my local chrome shop to get an estimate. It's not visible from the back, but there are a lot of dings, small dents, pitting and light rust to the original bumper. After getting a quote, I decided to go with a new bumper.
There are cheaper front bumpers on the market than the one Isettas-R-Us sells, but I don't think the fit and quality are going to be any near as nice as the bumpers Werner sells. You can see in this photo that the mounting bracket are exactly as original with adjustable sliding nuts. Other bumpers I have seen lack this detail. When I received the bumper, the brackets were not attached. It comes with the solid rivets to attach them just as the originals. I got a little paranoid that I might damage the bumper trying to set the rivets, so I opted to use chrome button head screws to attach the brackets. Something else you may be able to see in this photo is that the new bumper is a heavier gauge steel than the original. The original bumpers were quite thin gauge steel and dented easily.
Another thing I've noticed about some of the less expensive bumpers on the market is that top edge of the bumper does not correctly follow the contour of the door and as a result the rubber filler strip comes separated from the bumper at the corners. You can see in this photo how nicely the Isettas-R-Us bumper follows the contour of the door. The filler strip fits perfectly snug to the door. One other note about the filler strip Werner sells. Werner ships the filler strip a little longer than what you would need for the top of the bumper. The reason he does this is so that there is a little left over to use as spacers on the bottom of the bumper to prevent it from rubbing the door. I used three one inch pieces on the bottom. One at each corner, and one in the middle. Also worth mentioning is the quality of the chrome is also excellent.
As I mentioned in a previous post, Isettas-R-Us also sells a beautifully made rear bumper. Just like the front, it fits perfect and the quality is outstanding.
Next up, installing the dash and steering wheel.
Isetta - Previous Life
A few more scans of slides that the previous owner of my Isettas provided me with. If you're wondering about the spots on a couple of the pictures, unfortunately mold got to a few of the slides.
Friday, October 12, 2012
1963 Solyto Three Wheel Truck
Here's one you don't see come up for sale very often in North America. It's a 1963 three wheel utility vehicle called a Solyto. Made by the French manufacturer New Map, about 4000 were manufactured between the years 1952-1974. It's powered by a 125cc Ydral 2-stroke engine. It was said to have served it's purpose as a utility vehicle admirably well, being perfectly suited to rural French farmer and businessman. This one was listed for sale on Kijiji in Ontario Canada.
To see some pictures of one in better condition, check out Bruce Weiner's 1958 Solyto.
Wednesday, October 10, 2012
Isetta - Engine Panel
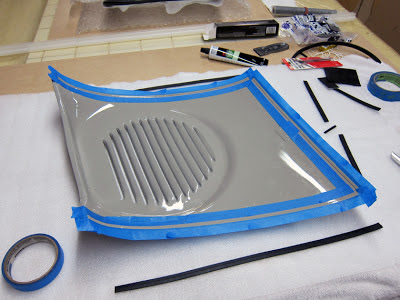
I was too stressed out to take photos while I was gluing the weatherstrip in the front door, but with that out of the way, I did take a few photos of gluing the weatherstrip in the engine panel. The 3M weatherstrip adhesive can be a little messy. I taped off the area around where the weatherstrip is is going to be installed.
Weatherstrip adhesive is basically like a contact cement. You need to apply a thin layer to both pieces that are being bonded together, let it dry until it's tacky, and then press your parts together. The problem with using tape to mask off areas is that the adhesive wants to pull off with the tape as you remove it. I had to run a razor along the edge of the tape as I lifted it off.
The new weatherstrip installed after removing the tape. I purchased to correct profile seal from Isettas-R-Us. It's exactly like the original. The back has a small step to accommodate the flange around the edge of the door, and the front is ribbed like the original.
After installing the engine panel I was a little bummed that it does not lay flat against the body. There is about a 1/8" gap on the sides near the middle. I realized that the rubber funnel on the engine that presses against the engine panel is pressing the panel out. Hopefully with time the rubber funnel will flatten and allow the panel to sit flush with the rest of the body. I noticed in old BMW press photos that even the cars used in press photos had this gap, so I'm not going to worry about it too much. On my unrestored red Isetta the engine panel sits completely flush with the body, but I think the reason that it does is because the rubber funnel is completely flattened out with age.
Friday, October 5, 2012
Tuesday, October 2, 2012
Isetta - Front Door
I finally got the door of my Isetta installed. It's been under a packing blanket on a work table in my shop for a long time, so it really feels good to get it on the car and free up a table.
I had the original hinges re-chromed. And of course, new rubber bumpers for the hinges.
New door seal. I used 3M Super Weatherstrip Adhesive (part # 08008 black) to glue my door seal in. It's a lot like a contact adhesive. You need to spread a thin coat on both surfaces, let the glue dry until it's tacky, and then press your seal to the door.
I'm having just a little bit of trouble with the door seems like it wants to sag on the handle side. To get it to close all the way, I have to lift up while I'm turning the handle. Obviously I need to do some tweaking to get the door properly adjusted, but I think I'll wait until I get the dash and the door shock installed before I make my final adjustments.
I still have a little bit of wiring to finish on the dash, but I'm pretty close to being ready to install the dash, door shock, and steering wheel.
Subscribe to:
Comments (Atom)


