A picture of the original Bosch horn still attached to the underside of the car. Check out that floor pan, not bad for a 50+ year old car.
Back side of the horn
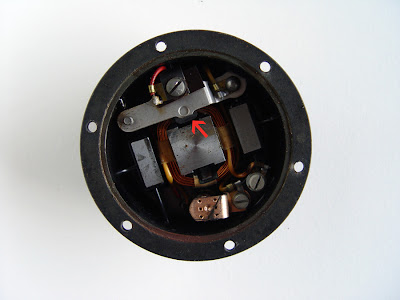
Disassembling the horn
The interior of the horn looked perfect, however it didn't work. Upon closer inspection I noticed the contacts (not visible in photo) had a lot of corrosion built up. After cleaning the contacts and reassembling the horn, it worked perfect.
A few of the horn pieces after bead blasting. In addition to these two pieces, all the original hardware was bead blasted and nickel plated.
Nickel plating after bead blasting
A few shots of the finished Bosch horn


Another fine DIY article. I have a nearly identical unit made by Noris. The only difference I see is in the spacer on your 5th picture from the top. Yours appears to have a wide rubber insulator beneath it while my spacer has a tiny one partially recessed into the bottom of the spacer. Does this difference sound correct to you in that your rubber insulator is nearly as wide as the spacer above it?
ReplyDeleteOne other question about the hidden contact. My contacts were fused together by corrosion. I eventually separated them with a dental tool, however the upper contact is a bit thick on one side. Should I try to even it up?
Other than that the inner workings look new. After reassembly the horn will only click regardless of how loose or tight the volume screw is adjusted. Any other suggestions?
You know, I just cleaned my contacts and it still doesnt work. What the heck is that little tube like thing under the ground connection? Mine was slimey and has 6-12v on it...
ReplyDelete