Saturday, November 24, 2012

Isetta - Previous Life

Recently the original owner of my Isetta's visited to see the latest progress. She brought some more slides she had found of when her and her husband owned and drove the cars. These slides are from a 1960 visit to the Harry S Truman Presidential Library in Independence, MO.


These pictures were taken several years before I was born, but I immediately recognized the location. My parents owned a business one block east of the Howard Johnson's, so during the 70's I remember often eating at this location and getting gas with my dad at the Standard station that is in the background.

Thursday, November 22, 2012

Renault Twizy


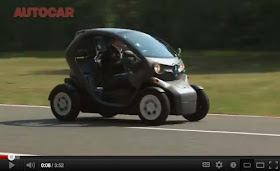
Click on either photo to go to an article in the NYT's about the Renault Twizy. The Twizy is a new electric microcar produced by Renault and manufactured in Spain. It has a top speed of 50mph and a battery range of 62 miles. Naturally it's not available in the US, but close to 8,000 units have already been sold in Europe by September 2012. Starting price is around $9,800.00 not including battery lease.


Click on this photo to go to a YouTube video of the Twizy in action.

Tuesday, November 20, 2012

1956 Csepel Danuvia 125 - Update

In my last Csepel update I had received and installed a new gear shift shaft and gear shift lever to replace the ones on my bike which had stripped splines. I also replaced the kick start lever which had some not so good repairs done to it previous to me purchasing the bike. Once everything was back together, I rode it around a little bit. I don't have tags for it yet so I was sticking close to home. After the first ride everything seemed great!


Later in the day my wife wanted to see the bike run, so I fired it up for another ride. Unfortunately the second ride of the day wasn't as fun as the first. The clutch began malfunction. I brought the bike in and opened up the clutch case and found a bakelite disc in the clutch stack that had broken and was in pieces in the bottom of the case. After consulting with a supplier of parts for eastern European bikes, I learned this bakelite plate was not a Csepel part and did not belong in the clutch stack. The original clutch friction plates were wore quite thin and I'm guessing somebody used the bakelite disc as a shim or spacer.


These are the old clutch plates removed and the broken bakelite shim that was in the stack. 


 The bummer about owning an obscure Hungarian bike in the US is when the bike is down in need of a part, it generally takes between 1-2 months to find the part and have it shipped to the US. The good thing is, I really haven't had that much trouble finding the parts. I recently received some new friction plates and am ready to put the bike back together. Originally there were five of the friction plates, but the new ones are much thicker and I'll only be using four.


You can see the 4 new plates are thicker than the old 5 plates.


Soaking the new friction plates in gear oil prior to installation.


These are the original clutch springs. Some of them have been overstretched or bent and are longer than other ones. The first time I put the clutch back together with these, some were loose and I had two break, so I decided I needed to replace all the springs. Also before I reassembled the clutch, I borrowed a boroscope from a friend to make sure there weren't any pieces of bakelite from the broken plate that had made their way into the gearbox. Everything looked clean inside the gearbox.


I didn't want to wait a month or more for clutch springs and figured I could find something in the US that would work. It took some trial and error but I finally found some Polini clutch springs for a Honda Hobbit scooter that seemed like a good match. 


Since I am only using 4 friction plates, I had a steel plate left over which I doubled up in the center of the stack to give me a little extra thickness. The clutch action felt really good with this combination of plates and the new springs.


Everything is back together. All that's left is to strain the gear oil and put it back in the bike.


S**T!!!!! I was straining the gear oil and at the bottom of the strainer there was a loose 5mm ball bearing. I believe this is the ball bearing that goes between the clutch throwout rod and spindle. It probably came out on one of the many times I had the clutch apart. It would also explain why my throwout pin was barely long enough to get a nut on. Looks like I'm going to have to disassemble the clutch one more time.

Thursday, November 15, 2012

Isetta - Windshield Installed

I installed my windshield  as well as some other items such as the headlights, turn signals. windshield wiper, and mirrors.


The three items I used to install the windshield and rubber seal were dish soap, 3/16" nylon cord, and a windshield locking strip tool. The first step is to fit the seal around the glass. Next I used dish soap as a lubricant on the rubber seal and around the opening of the Isetta body where the glass was going to be installed. I then inserted the 3/16" cord that had been soaking in soapy water into the the 2 sides and top edge of the rubber seal. I then set the glass with the rubber seal on the bottom edge of the window opening. Then from the inside of the car I gently pulled the cord which pulls the rubber seal over the body flange. The last step is to install the locking strip. The locking strip tool is very inexpensive and really makes installing the locking strip fairly easy.


My front windshield went much smoother than the rear glass. My rear glass was the first piece of auto glass that I've ever installed. One thing that happened when I was installing the rear glass was that my dish soap and water mixture I was using as a lubricant dried out to quickly. The result was that it got difficult to pull the cord and the rubber seal got a little tattered on the inside of the car in a few spots trying to pull it over the body flange without enough lubricant. On the front I used straight dish soap slathered on the car and rubber seal and kept a wet sponge handy to keep everything wet and slippery. The second time around the rubber seal pulled over the metal lip much easier. One other thing I was a little worried about was the fit of an aftermarket windshield. Thankfully this windshield manufactured by UROGLAS in the UK fit quite nicely.


A couple of ebay scores in this photo. I picked up these old style Hella headlights as well as genuine Hella turn signals for what I felt were some very reasonable prices. 


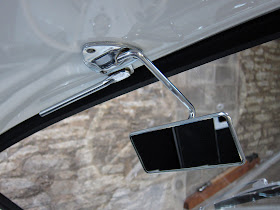
The original Albert mirror head on my side mirror was pretty messed up. It had been crudely pried open to replace the glass, so it was deformed and had plier marks all around the edge. I really wanted to use the original Albert mirror and spent quite a bit of time trying to rescue it, but in the end I decided to find a replacement. Now I see quite a few Bumm reproductions of the Albert mirrors on ebay, but it seems they weren't around a few years ago when I was looking for a replacement. I ended up using a period correct NOS German made Frese mirror.


A few more interior items installed. I still need to install the hi/lo and turn switches and connect the dash wiring to the terminal block and then all I have left is the side and front door interior panels, sunroof, and seat upholstery.

Sunday, November 11, 2012

Isetta - Alberta's "Sputnik"


Need an Isetta to go with that tractor or hay baler. Nance Farm Supply Company out of Alberta, Canada had you covered as distributors of the UK Brighton built version of the Isetta. Most of the UK built Isetta's had 3-wheels and were right hand drive, but for the  Canadian market they had 4 wheels and were left hand drive. If you want to see some photos of a really nice restoration of a UK built Canadian version of the Isetta, check out  www.isettabob.com

Thursday, November 1, 2012

Isetta - Dash and Steering Wheel

I've now got my dash and steering wheel installed. I was recently watching the Isetta episode of Wheeler Dealers from my last post and noticed that they installed the door, dash, and steering wheel in completely different order than I did. I installed my bare door (no glass) first. They installed their steering wheel and column with the dash attached first. I next attached my dash to the door, followed by attaching the steering column to the steering housing and dash.  They installed their completely assembled door after they had installed the steering wheel, column, and dash. After their door was mounted, they connected the dash to the door. The last step for me will be installing the glass. I'm sure the Wheeler Dealers have restored many more cars than me, but after watching them, I feel the order I did it in was much easier. 


Before installing my dash and steering wheel, I finished up the wiring on my dash. I had one little minor disappointment with the wiring. I couldn't fit the new wiring through the original piece of conduit that runs from the dash to the left side of the car. I ended up using a black woven sheath instead. I really want to keep the car as original as possible, but there was just no way to get the new wiring through the original conduit.


One other little problem I had was the silent blocks that are installed in the door were a little to wide to fit in the openings of the dash where it fits over them. If you're installing silent blocks in your door, I would first check to make sure they fit in the dash. It's much easier to sand or file them a little thinner before they're installed than having to file them down after they're installed in the door like I had to do.


Check out that new reproduction rubber floor mat. I'm really glad Isettas-R-Us reproduces these. It's a nice original detail. Now that the dash and steering wheel are installed I need to finish up the wiring and get the front windshield installed.